
- Make sure this fits by entering your model number.
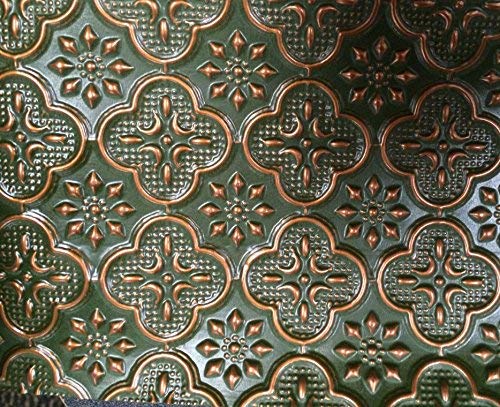
- Decorative Backsplash Faux Tin Green Copper Plastic Looks Like Metal,can be install in GARAGE,Hallway,Recreation room,Bathroom Toilet area,Around Door as a wall paper,renovation,remodeling ext…
- Faux antique Backsplash Easy to install,staple on,nail on,tape on,& maintain, easy cut with regular scissors,can be glued,staple on,nail on to a wall,to existing tile,kitchen door,cabinets,around columns as a decoration,bar area, ext..
- Patina copper backsplashlooks like tin Backsplash Instantly transform your kitchen, bathroom,hallway,Restaurant can use as wall covering and Bar Counter Top Cover,wall paneling. ext..
- Faux tin Backsplash for kitchen,for remodeling, copper hammered.diy, sink, use for ANY OFFICES,Any Nigth Club,Basement,Recreations Rooms,in PATIO ROOF CANOPY ext…
- Backsplash can glued on wainscoat,sheet rock,stone,glass and any flat surfase,tile back splash,green,eco-friendly,recyclable.bathroom tile,Column covering with decorative back splash ideas.wall panels. ext..
Tin Beautiful DECORATIVE & quality back splash Plastic wall covering are easily installed with adhesive glue/contact cement or glue with LOCTITE “power grab” all – purpose constriction adhesive over existing ceiling tile, Ul Rated. Tin like appearance at a much more affordable price. These wall coverings will instantly & elegantly transform your kitchen or room! The rolls are 2 feet wide. One small roll will cover approximately 50 square feet. There will be a flat rate shipping fee of $25.00 for the 25 foot roll. Back splash. Restaurant renovation, Bathroom remodel, office renovation, wall cover. INSTALLATION INSTRUCTIONS FOR PVC BACK SPLASH. Each PVC backsplash comes in a roll; it is therefore recommended that you use either an object to hold down one side of the roll while rolling it out or have someone help you hold it on the other side to ensure ease and stability. 1.Measure the total length of the piece you wish to install. Cut the piece at the desired length, with regular scissors. 2.Fit the piece under the cupboards 3.Apply glue (contact cement) on the back of the back splash and on the wall (where you are going to attach it). We suggest Gel Contact Cement. 4.Let the glue dry till it become “tacky” and attach the piece to the wall, squeezing out all the air from behind the back splash. You are done! Now you can cover the edges of a back splash with metal/wood/plastic edging and start enjoying your new back splash!